Elderberries are versatile fruits used to make jams, jellies, pies, and wine. The elderberry bush also has ornamental value with its lacy white flower clusters in spring and deep purple berries in summer and fall. Elderberries are relatively easy to grow, and one of the simplest ways to propagate new bushes is by planting elderberry cuttings.
Overview of Planting Elderberry Cuttings
Planting elderberry cuttings allows you to replicate an existing elderberry plant without buying new stock. Taking and rooting cuttings from an established plant preserves its genetic characteristics. Follow these key steps when planting elderberry cuttings:
- Take 6-8 inch cuttings from healthy stems when plants are dormant in late winter.
- Strip leaves and buds from the lower half of each cutting.
- Dip the bare end in rooting hormone to encourage root growth.
- Plant the cuttings in pots filled with loose, well-draining potting mix.
- Water to keep the soil consistently moist but not saturated.
- Place pots in bright, indirect light and warm room temperature.
- Roots and new top growth will emerge in 4-8 weeks.
- Transplant-rooted cuttings into the garden in the fall or the following spring.
When done correctly, planting elderberry cuttings is an easy and reliable way to expand your patch. Continue reading for more details on each step in the process.
Choosing Elderberry Cuttings
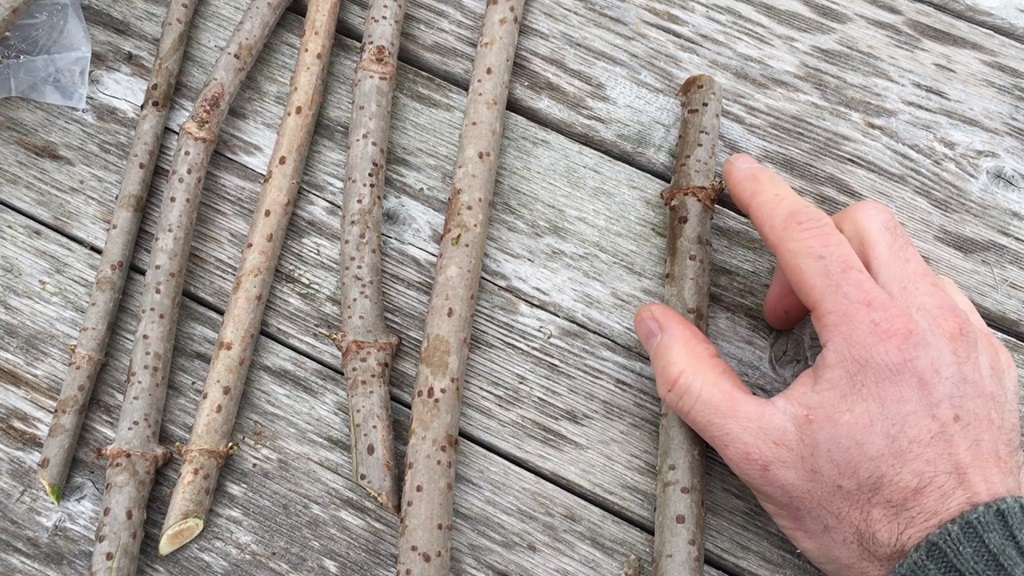
The first step is selecting one-year-old wood cuttings from an established elderberry plant in late winter. Look for stems that:
- Are pencil-thickness – around 1/4-1/2 inch diameter.
- Display no signs of damage or disease.
- Grew during the previous season. Older branches may be too woody.
- Have leaf buds – avoid any bare sections.
You can take cuttings from both upright and weeping varieties of elderberry. For best results, gather cuttings on a dry day after the coldest winter weather has passed.
When to Take Cuttings
- In cold climates, take cuttings in early to mid-February or March.
- In warmer zones, late January may work.
- Cuttings root best before new spring growth emerges.
Mid-winter is ideal because the dormant stems will readily form roots rather than foliage. The timing depends slightly on your zone and the weather in a given year. Pay attention to when buds start swelling – that’s your cue to take cuttings immediately.
Where to Get Cuttings on the Bush
- Take cuttings from the tips of one-year-old stems that grew last season.
- Focus on lateral branches rather than the main central stem.
- Select branches growing on the south side that receive plenty of sun.
This encourages straight, healthy new wood ideal for cuttings. Avoid northern branches lacking sun exposure – they tend to be spindly and less vigorous.
How Many Cuttings to Take
- Take 6-12 cuttings to ensure several rooted plants.
- Start more than you need since not every cutting may root.
- Take cuttings from multiple bushes, if possible.
Spreading out cuttings avoids over-cutting any one plant. For starters, aim for around 8-10 cuttings from 2-3 mature elderberry plants. You can take additional cuttings in subsequent years once your new plants are established.
Preparing Elderberry Cuttings
Once you’ve gathered quality one-year-old wood cuttings, you’ll need to prepare them before sticking them in the rooting medium. Here’s how:
Cutting the Stems
- Use bypass pruners or sharp, sterile shears for clean cuts.
- Cut each stem to 6-8 inches long.
- Make a straight bottom cut right below a leaf node.
- Cut the top 1/4 inch above a node at a 45-degree angle.
The angled top cut helps identify which end is which when working with multiple cuttings. The bottom cut encourages roots to sprout, while the top cut sheds water.
Removing Leaves and Buds
Leave the top 2-3 leaves, but strip off the rest. Rub off any remaining buds from the lower half of each cutting using your finger. You only want roots to emerge from this end, not more top growth.
Wounding the Base
- Use a sharp knife to peel away 1-2 inches of outer bark at the base.
- Scrape the stem so it’s green underneath the bark.
Wounding creates more points for new roots to form once the cutting is stuck in soil or another rooting medium.
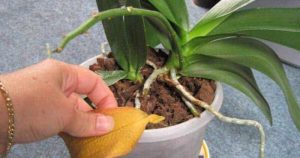
Using Rooting Hormone
- Dip the wounded base of each cutting in rooting hormone powder.
- Shake off any excess powder before planting.
The rooting hormone accelerates cell division and stimulates rooting. Look for a powder containing the active ingredient indole-3-butyric acid (IBA).
Preventing Mold and Disease
Once cut, elderberry stems are prone to mold. To avoid this:
- Keep cuttings cool and moist until planting. Refrigerate if possible.
- Plant cuttings as soon as possible, within a few hours.
- Avoid overcrowding cuttings to allow airflow.
Proper storage and quick planting prevent cuttings from shriveling or developing fungal issues. Now, it’s time to stick the prepped cuttings into the rooting medium.
Selecting a Rooting Medium

You have a couple of choices when selecting a medium for rooting elderberry cuttings. The most common options are:
Potting Soil
- Use a loose, light potting mix with good drainage.
- Incorporate extra perlite, vermiculite, or sand.
- Avoid dense soil that stays too wet.
Well-aerated potting mixes provide the moisture and oxygen balance cuttings need to form roots. Pre-moistened soilless starting mixes work well.
Propagation Mixes
- Purchase a ready-made propagation/cutting mix.
- Look for blends containing peat moss, perlite, and/or vermiculite.
- These are formulated for optimal drainage and moisture retention.
You can find specialized rooting mixes at most garden centers. Or make your own blend by combining equal parts peat and perlite.
Other Mediums
Some gardeners root elderberry cuttings in:
- Sand or a sand/soil mix.
- Sphagnum peat or coco coir.
- Compost or leaf mold.
Stick with a loose, fluffy medium that won’t compact and suffocate the cutting. Test new mediums in a small batch first.
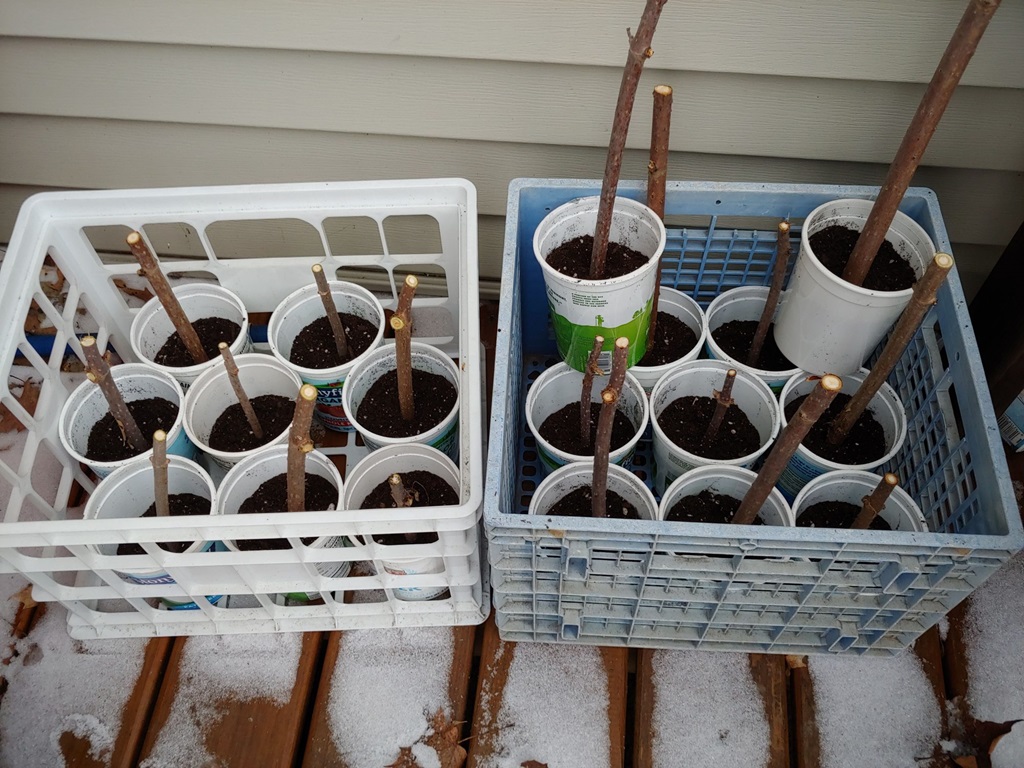
Planting Elderberry Cuttings
Once you have your rooted cuttings prepared and growing medium selected, it’s time to stick them in place so they can develop roots. Follow these steps:
Choosing Containers
Select containers or trays that are:
- At least 4 inches deep with drainage holes.
- Wider than the cuttings are long.
- Made from plastic, terra cotta, or other non-porous material.
Aim for a container large enough to hold all your cuttings without crowding. Trays split into cells work efficiently.
Preparing the Medium
- Fill containers nearly to the top with your soilless mix.
- Water thoroughly until excess drips out the bottom.
Damp – but not soggy – medium encourages rooting. Let excess water drain before planting.
Inserting the Cuttings
- Poke holes in the medium with a pencil, chopstick, or dibble.
- Insert cuttings at an angle or vertically.
- Leave 2-4 leaf nodes above the surface.
- Gently firm the soil around each cutting.
Angled insertion offers more surface area for roots to emerge. Just the buried portion will root so keep plenty of stem above ground.
After Planting Care
- Label pots with the plant variety and date.
- Water again after planting if the soil feels dry.
- Cover trays or pots with plastic wrap or a cloche to retain moisture.
Keeping the environment humid prevents cuttings from drying out before taking root. Now put your containers in an ideal spot to root.
Rooting Elderberry Cuttings
Providing the right conditions as your cuttings start to root is crucial. Follow these tips:
Location
Place pots or trays:
- At room temperature around 65-75°F.
- In bright, indirect light.
- Out of direct sun to avoid overheating.
- Where they won’t freeze.
Warmth encourages fast root growth. Bright light keeps cutting from becoming spindly but direct sun will scorch tender stems.
Maintaining Moisture
- Keep the rooting medium evenly moist, not soaked.
- Lift pots to check the weight and water as needed.
- Add more water around the edges, not directly on cuttings.
- Mist cuttings daily to increase humidity.
- Water more frequently in warmer temperatures.
- Allow the surface to dry slightly between waterings.
- Check for mold or rotting and remove any affected cuttings.
The goal is to keep the environment damp but not wet. Poor drainage or oversaturation will cause cuttings to fail.
Providing Warmth
Warmth accelerates rooting. Try these tricks:
- Use heating mats made for seed starting.
- Set pots above (not directly on) radiators or appliances.
- Maintain greenhouse temperatures around 70°F.
Fluctuating temperatures can also delay rooting. Keep pots in the warmest spot in your home.
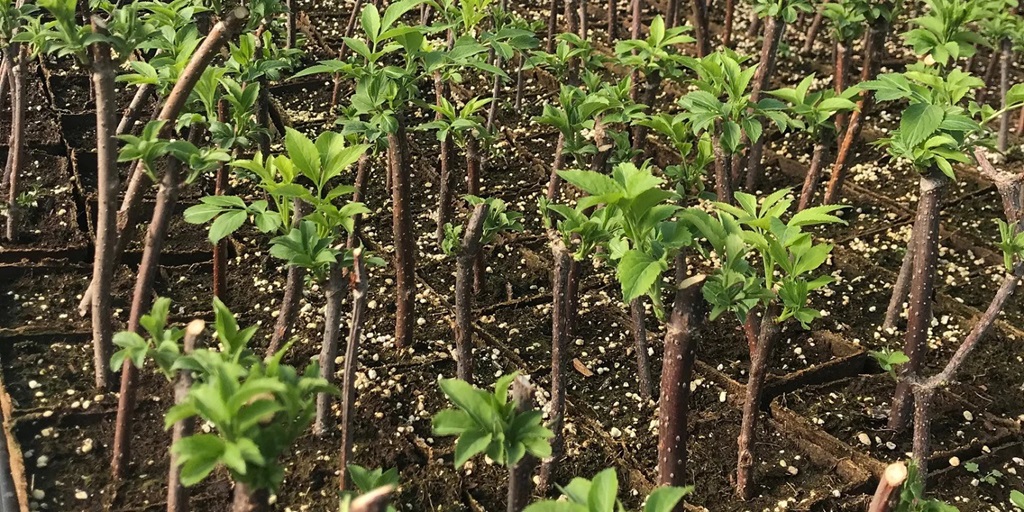
Monitoring Progress
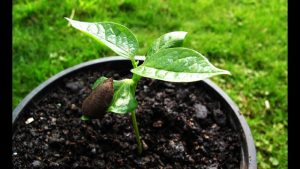
Start checking for rooting progress in 4-6 weeks. Gently tug on cuttings to feel resistance from new root growth. Other signs of success include:
- New green shoots emerge from buds.
- Leaf growth looking healthy, not shriveled.
- Basal end callusing over and healing.
- Hardened off stems that resist bending.
Once most cuttings show good top and root growth, it’s time to begin the hardening off and transplant process.
Hardening Off Elderberry Cuttings
Hardening off transitions tender young cuttings into heartier plants that can withstand the outdoor environment. Follow these hardening-off tips:
Reducing Humidity
- Remove domes and plastic wrap once plants are rooted.
- Allow the soil surface to dry between waterings.
- Move plants to a shady spot outdoors during the day.
This slow process toughens plants by exposing them to moving air and lower humidity levels.
Monitoring Light Exposure
Over the course of two weeks:
- Start by placing pots in bright shade protected from wind.
- Slowly increase direct sunlight for a few hours daily.
- Bring plants back indoors overnight.
Adjust the light schedule based on temperatures and wind. Avoid shocking tender growth with too much sun.
Decreasing Watering
- Allow pots to dry down between waterings.
- Water deeply only when the soil is partly dry.
- Reduce watering even more right before transplanting.
Alternating moisture levels stimulates root growth beyond the original cuttings. Just don’t let plants wilt severely.
Transplanting Cuttings
Once hardened off, elderberry cuttings are ready to be moved to their permanent growing positions.
- Transplant in autumn after several frosts or the following spring.
- Water in each planting with compost tea to reduce transplant shock.
- Remove any flower buds that form in the first year to encourage root establishment.
Newly planted cuttings need TLC as they settle in. Hold off on fertilizer and aggressive pruning initially.
Caring for Elderberry Starts
The young plants that grow from your successful elderberry cuttings will require proper care to become thriving, fruit-bearing bushes. Follow these tips:
Site Selection
Choose a planting spot that is:
- In full sun to part shade.
- In nutrient-rich, well-draining soil.
- With adequate airflow and space between plants.
Elderberries thrive in U.S. Department of Agriculture Hardiness Zones 3-10. Space plants 6-12 feet apart depending on the variety.
Watering Needs
- Water 1-2 times per week until established.
- Increase water during droughts or extreme heat.
- Reduce watering once plants are mature.
- Avoid overwatering.
Consistent moisture is key in the first year. Mature plants are quite drought-tolerant.
Fertilizing
- Apply balanced organic fertilizer each spring.
- Fish emulsion or compost tea also provides nutrients.
- Hold off on high-nitrogen fertilizers that spur too much leafy growth.
Moderate feeding is sufficient for elderberries. Excess nitrogen can inhibit flowering and fruit production.
Ongoing Care
- Prune annually to shape and improve yields.
- Apply fresh mulch around plants each year.
- Monitor for pests like Japanese beetles.
- Pick berries when ripe to prevent bird loss.
With proper site selection and care, your elderberry cuttings will thrive for years to come!
Troubleshooting Elderberry Cuttings
Sometimes cuttings fail to take root or struggle after transplant. Common problems include:
Poor Root Development
This may be from:
- Collecting cuttings too early or late in dormancy.
- Insufficient bottom heat and humidity.
- Overly dense, compacted growing medium.
- Consistently soggy soil or poor drainage.
Adjust timing, conditions, and medium to encourage healthy root growth.
Leggy Growth
If plants are stretching and weak, it’s likely due to:
- Insufficient sunlight after rooting.
- Excess nitrogen fertilization.
- Neglecting the hardening off period.
- Transplanting too early before roots are established.
Improve light exposure, reduce fertilizer, harden off properly, and wait to transplant.
Shock After Transplanting
To prevent shock:
- Harden off cuttings thoroughly before transplanting.
- Move to a permanent spot before new growth gets tender.
- Transplant in cloudy weather then water in wells.
- Use compost tea to inoculate soil with beneficial microbes.
With proper techniques, you can successfully propagate elderberry plants from cuttings. Adjust your practices if any issues arise.
Conclusion
Starting elderberries from cuttings is an easy, gratifying way to expand your elderberry patch. Most cuttings will readily root and grow into productive bushes with the right practices. Just remember to take cuttings at the optimal time, provide bottom heat and humidity while rooting, slowly harden off plants, and properly care for them after transplanting. Your cuttings will never mature into beautiful, berry-producing elderberry plants.
Frequently Asked Questions
How long do elderberry cuttings take to root?
Most elderberry cuttings root in 4-8 weeks. Check for signs of new growth after 4-6 weeks. Warmer temperatures speed up the rooting process.
Do elderberry cuttings need light to root?
Yes, bright indirect light is ideal. Direct hot sun can burn and dry out tender cuttings. Avoid too much darkness which results in spindly, weak growth.
Should I use rooting hormone on elderberry cuttings?
Rooting hormone boosts the chances of success but isn’t essential. Cuttings may take a bit longer to root without it. Use a powder containing IBA for best results.
How often do I water newly rooted elderberry cuttings?
Check soil moisture daily and water when the top inch becomes dry. New cuttings need consistently damp soil to establish roots. Allow more drying between waterings once established.
When is the best time to transplant rooted elderberry cuttings?
Transplant elderberry cuttings outdoors in early fall after some frost or the following spring after the last frost. This gives new roots time to develop before the summer heat.