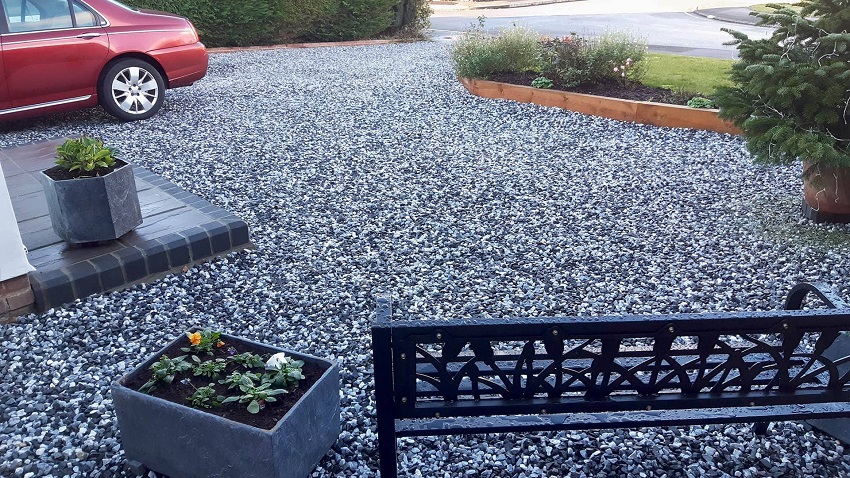
Welcome to a comprehensive guide on installing grey garden stones in your driveway. In this article, we will explore the benefits, considerations, and step-by-step process of transforming your driveway with stylish and functional garden stones. Whether you are looking to enhance the curb appeal of your home or create a durable and low-maintenance driveway, grey stones can be an excellent choice. So let’s dive in and discover how you can elevate your driveway with this elegant and practical solution.
Why Choose Grey Garden Stones?
Enhancing Curb Appeal
The first impression matters, and your driveway plays a significant role in shaping the overall aesthetic appeal of your property. Grey garden stones offer a sophisticated and modern look that can instantly elevate the appearance of your home. Their neutral tone blends well with various architectural styles and complements both traditional and contemporary designs.
Versatility and Design Options
The stones come in various sizes, shapes, and textures, providing you with ample design options. You can opt for smaller, uniformly shaped stones for a sleek and polished look or choose larger, irregularly shaped stones for a more natural and rustic appeal. The versatility of the stones allows you to customize the design to match your personal taste and complement your existing landscape.
Durability and Longevity
When it comes to driveways, durability is paramount. Grey garden stones are known for their exceptional strength and durability, making them an ideal choice for driveways that withstand heavy vehicles and regular traffic. These stones are resistant to cracking, chipping, and fading, ensuring a long-lasting and low-maintenance driveway solution.
Low-Maintenance Solution
Maintaining a pristine driveway shouldn’t be a hassle. Grey stones require minimal maintenance compared to other driveway materials. They are resistant to oil stains and can be easily cleaned with regular sweeping and occasional power washing. This low-maintenance characteristic makes the garden stones a practical choice for homeowners who value convenience without compromising on aesthetics.
Installation Process
Now that we understand the advantages of grey garden stones, let’s delve into the step-by-step installation process:
Step 1: Planning and Preparation
Before you begin the installation, it’s essential to plan the layout and measure the area accurately. Clear the existing driveway surface and remove any obstacles or debris. Mark the boundaries and consider any necessary adjustments or slopes to ensure proper drainage.
Step 2: Excavation and Base Preparation
Next, excavate the area to the required depth, taking into account the thickness of the base and the garden stones. The depth will depend on various factors, including the soil type and expected traffic load. Once the excavation is complete, create a stable base by compacting the soil and adding a layer of gravel or crushed stone. This base will provide a solid foundation for the garden stones.
Step 3: Edging Installation
To create a neat and defined edge for your driveway, install sturdy edging material along the sides. This will help contain the garden stones and prevent them from spreading onto adjacent areas. Choose edging options that complement the overall design and ensure they are securely installed.
Step 4: Weed Control and Geotextile Fabric
To prevent weed growth and maintain the integrity of your driveway, it’s advisable to lay a geotextile fabric over the compacted base. This fabric acts as a barrier, inhibiting weed growth while allowing proper drainage. Ensure the fabric covers the entire area and overlaps at the edges for maximum effectiveness.
Step 5: Garden Stone Installation
Now comes the exciting part—laying the grey garden stones. Start from one corner and work your way across the driveway, ensuring a consistent pattern and spacing. Place the stones firmly onto the geotextile fabric, pressing them down to create a level surface. Use a rubber mallet to adjust the height and alignment of individual stones if needed.
Step 6: Finishing Touches
Once all the garden stones are in place, inspect the driveway for any loose or uneven stones. Fill any gaps with additional stones or sand, ensuring a seamless and stable surface. Use a broom or blower to remove any excess debris, and water the driveway lightly to settle the stones.
Maintenance Tips for Longevity
To ensure the longevity and visual appeal of your grey garden stone driveway, follow these maintenance tips:
- Regularly sweep or use a leaf blower to remove leaves, dirt, and debris.
- Avoid using harsh chemicals or solvents that may damage the stones.
- Periodically inspect for loose stones and fill any gaps promptly.
- Consider applying a stone sealer to enhance the stones’ color and protect against stains.
Conclusion
Congratulations! You are now equipped with the knowledge to transform your driveway with elegant grey garden stones. From enhancing curb appeal to providing durability and low maintenance, these stones offer a host of benefits. Remember to plan the layout carefully, prepare a solid base, and follow the installation steps for a successful outcome. With proper maintenance, your grey garden stone driveway will continue to impress for years to come. So go ahead and embark on this exciting project to create a stunning and functional entrance to your home.


