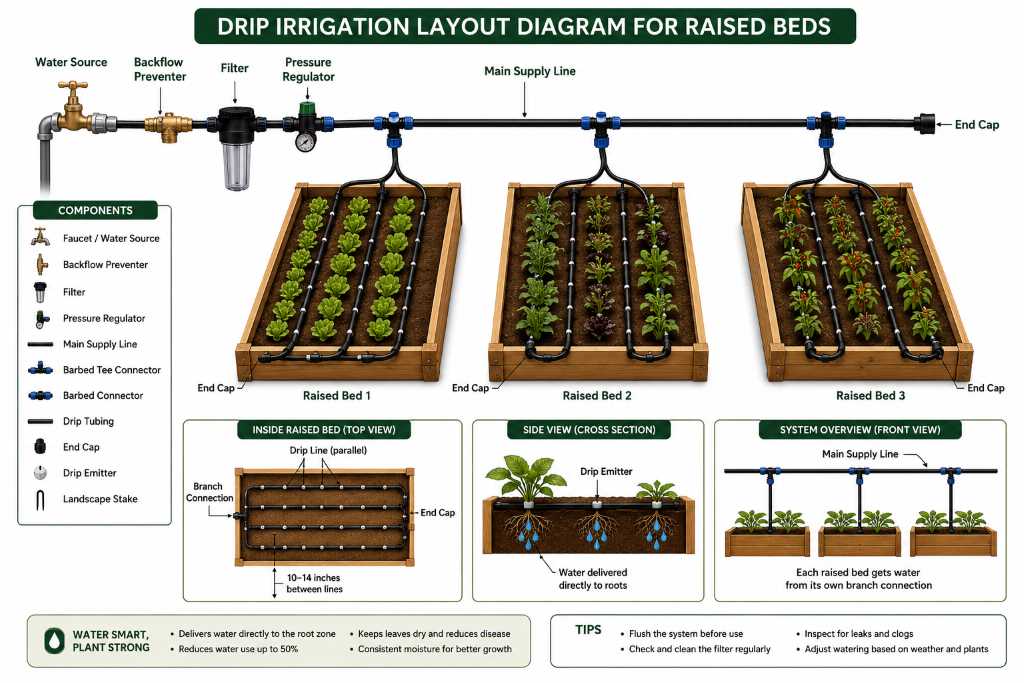
A simple drip irrigation layout diagram for raised beds uses a main supply line connected to drip tubing that runs across each bed in parallel rows. This layout delivers water directly to plant roots, reduces waste, and keeps soil evenly moist for healthier vegetable, herb, and flower gardens.
Raised bed gardening continues growing because it improves drainage and simplifies maintenance. Studies show drip irrigation can reduce water use by up to 50% compared with traditional sprinklers. Furthermore, watering directly at the root zone limits evaporation and supports stronger plant growth. This guide explains practical layouts, installation methods, and maintenance tips for creating an efficient raised bed irrigation system.
Why a Drip Irrigation Layout Matters for Raised Beds
A well planned layout distributes water evenly across every planting row. Therefore, plants receive consistent moisture without creating dry or soggy sections.
Proper planning also reduces wasted tubing, unnecessary fittings, and future maintenance costs. Meanwhile, thoughtful garden design complements irrigation efficiency with plan cottage garden flowers ideas that maximize planting space.
Raised beds contain limited soil volume, so moisture changes happen quickly. Consequently, dependable drip irrigation protects vegetables from drought stress during warm growing seasons.
Basic Drip Irrigation Layout Diagram for Raised Beds
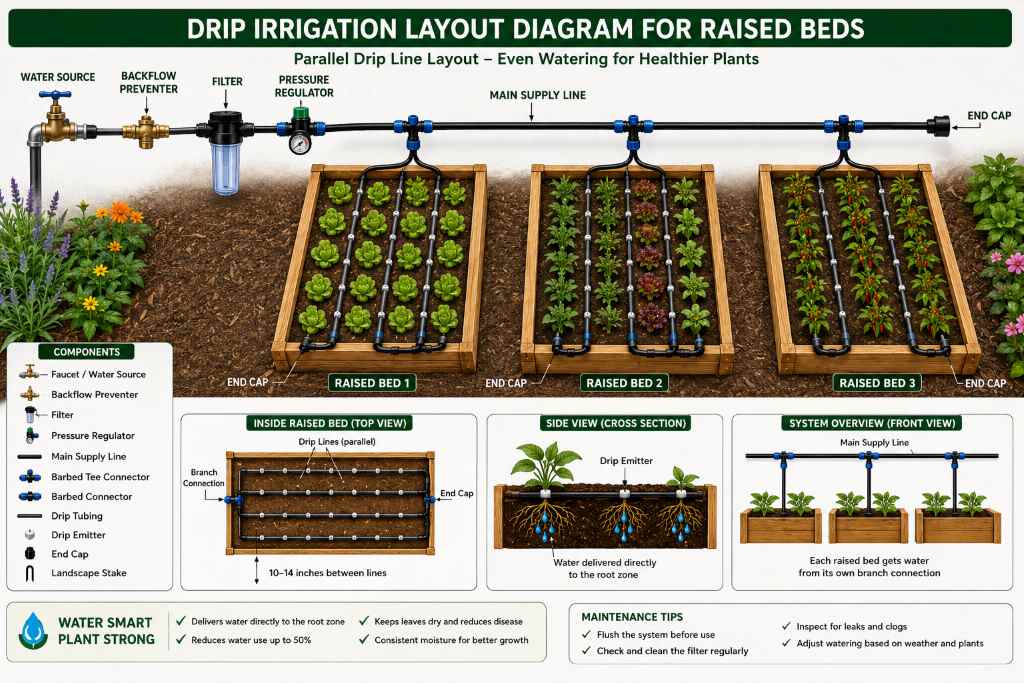
The following diagram represents one of the most effective layouts for rectangular raised beds. It suits vegetables, herbs, flowers, and mixed planting arrangements.
Water Source
     │
Filter
     │
Pressure Regulator
     │
Main Supply Line
═══════════════════════════════════════
     │          │           │
     │          │           │
 ┌────────┐ ┌────────┐ ┌────────┐
 │ Bed 1  │ │ Bed 2  │ │ Bed 3  │
 │========│ │========│ │========│
 │═══════ │ │═══════ │ │═══════ │
 │═══════ │ │═══════ │ │═══════ │
 └────────┘ └────────┘ └────────┘
     │          │           │
 End Cap    End Cap     End Cap
Each raised bed receives water from its own branch connection. Likewise, parallel drip lines provide equal moisture throughout the planting area.
Recommended Layouts for Different Raised Bed Sizes
2 x 4 Foot Raised Bed
One or two drip lines normally provide complete coverage inside smaller raised beds. Additionally, compact layouts simplify installation and reduce material costs.
- One supply connection
- One or two drip lines
- Emitter spacing around twelve inches
- End cap at each tubing end
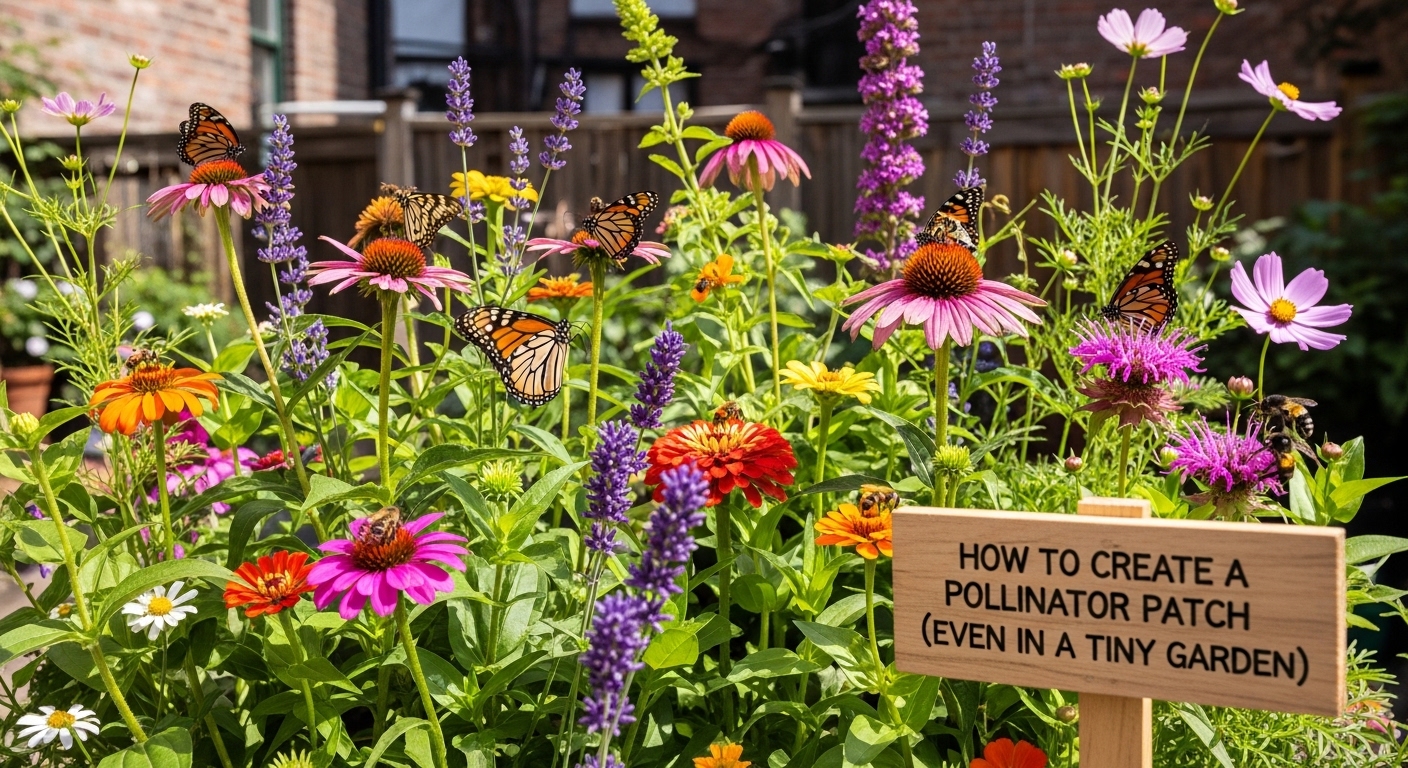
Smaller gardens often benefit from attracting helpful insects beside edible crops. Likewise, combining irrigation with a create pollinator patch strategy supports healthier plant production.
4 x 8 Foot Raised Bed
Three or four parallel drip lines usually provide balanced watering across larger vegetable beds. Consequently, tomatoes, peppers, beans, and lettuce receive consistent moisture.
- One branch connection
- Three or four drip tubes
- Twelve inch spacing between tubes
- Pressure regulated water supply
Wide Raised Beds
Very wide beds often require additional drip lines to eliminate dry spots. Therefore, maintain equal spacing between tubing throughout the growing area.
Essential Components for a Reliable System
Every efficient drip irrigation system depends upon several important components working together. Each part improves water delivery while protecting the irrigation network.
- Main supply tubing
- Pressure regulator
- Water filter
- Backflow preventer
- Drip tubing
- Barbed connectors
- End caps
- Automatic timer
Routine inspections also improve irrigation performance throughout every growing season. Moreover, following everyday garden growth tips helps maintain healthier raised beds with less effort.
How to Install the Layout Step by Step
Step 1: Measure Every Raised Bed
Measure each bed before purchasing irrigation materials and connectors. This preparation prevents shortages during installation and reduces unnecessary expenses.
Step 2: Install the Main Supply Line
Run the main tubing beside every raised bed using gentle curves. Afterwards, secure the tubing with landscape stakes for stability.
Step 3: Add Pressure Protection
Install the filter before attaching the pressure regulator near the water source. Consequently, clean water reaches every emitter without clogging problems.
Step 4: Connect Branch Lines
Punch connection holes carefully into the main supply tubing. Then attach branch connectors leading directly into each raised bed.
Step 5: Position Drip Tubing
Lay drip tubing across every bed using evenly spaced parallel rows. Afterwards, secure each line with plastic landscape stakes.
Step 6: Flush the System
Leave every end cap open before turning on the water supply. This process removes dirt and construction debris from the tubing.
Step 7: Close End Caps
Install end caps after flushing finishes completely. Finally, inspect every emitter for even water flow across the beds.
Best Spacing Guidelines
Proper spacing creates balanced moisture distribution throughout every raised bed. Therefore, adjust tubing placement according to plant spacing and mature size.
- Drip line spacing: 10 to 14 inches
- Emitter spacing: 12 inches
- Main supply beside beds
- Avoid crossing drip tubes
- Keep tubing straight whenever possible
Common Layout Mistakes to Avoid
Many gardeners install too few drip lines inside wide raised beds. Consequently, plants growing near edges often receive insufficient moisture.
Another common mistake involves skipping the pressure regulator during installation. High water pressure frequently damages emitters and creates uneven watering patterns.
Poor filtration also shortens irrigation system life through clogged emitters. Therefore, always include a quality filter before the tubing network.
Some gardeners forget seasonal inspections after harvesting crops every year. Regular maintenance prevents expensive repairs and improves long term reliability.
Maintenance Tips for Long Lasting Performance
Flush the system several times during every growing season to remove sediment. Clean tubing supports steady water flow across all planting areas.
Inspect connectors regularly because temperature changes sometimes loosen irrigation fittings. Early repairs prevent leaks before they become larger problems.
Replace damaged emitters immediately whenever uneven watering appears inside raised beds. Healthy irrigation supports consistent plant development from planting until harvest.
Store removable components indoors during freezing weather whenever possible. Proper winter protection extends equipment lifespan and reduces replacement costs.
Benefits of Using Drip Irrigation in Raised Beds
- Reduces water waste
- Delivers moisture directly to roots
- Limits weed growth
- Keeps foliage dry
- Supports healthier harvests
- Saves watering time
- Works well with automatic timers
- Improves fertilizer efficiency
Final Thoughts
A carefully planned drip irrigation layout diagram for raised beds creates healthier plants while reducing water use throughout the growing season. Simple parallel tubing, proper spacing, and quality components deliver dependable irrigation with minimal maintenance.
Start by measuring your raised beds, selecting the correct layout, and installing each component carefully. A well designed drip irrigation system will reward your garden with healthier growth and easier maintenance year after year.
Frequently Asked Questions
How many drip lines should a raised bed have?
Most raised beds perform well with two to four evenly spaced drip lines.
Should the main supply line run inside the raised bed?
No, placing the main supply beside the beds simplifies maintenance and future expansion.
What is the best spacing between drip lines?
Ten to fourteen inches works well for most vegetables and flowering plants.
Do I need a pressure regulator for drip irrigation?
Yes, a pressure regulator protects emitters and provides consistent water flow.
Can I automate a raised bed drip irrigation system?
Yes, adding a timer allows automatic watering based on your preferred schedule.